How to set your work hours in Outlook?
Office 365 helps you manage and share your work schedule. New features allow you to specify more details about your work schedule: define your start time, end time and days of your week.
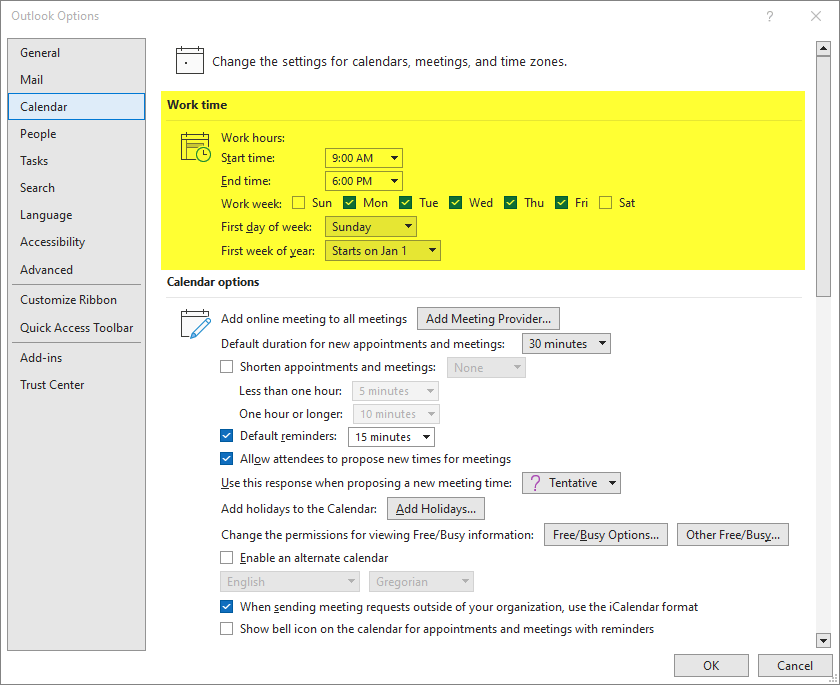
Outlook for Windows
To set your work schedule in Outlook, do the following:
- Select File > Options > Calendar
- Then define your work schedule by choosing start time, end time, and work week.
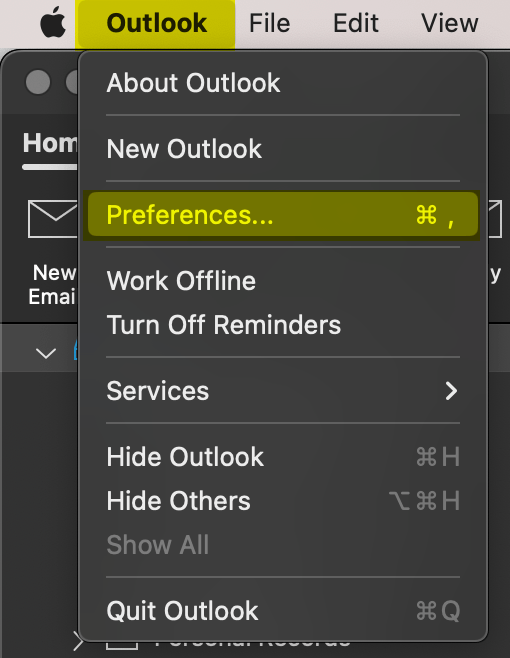
Outlook for MacOS
To set your work schedule in Outlook, do the following:
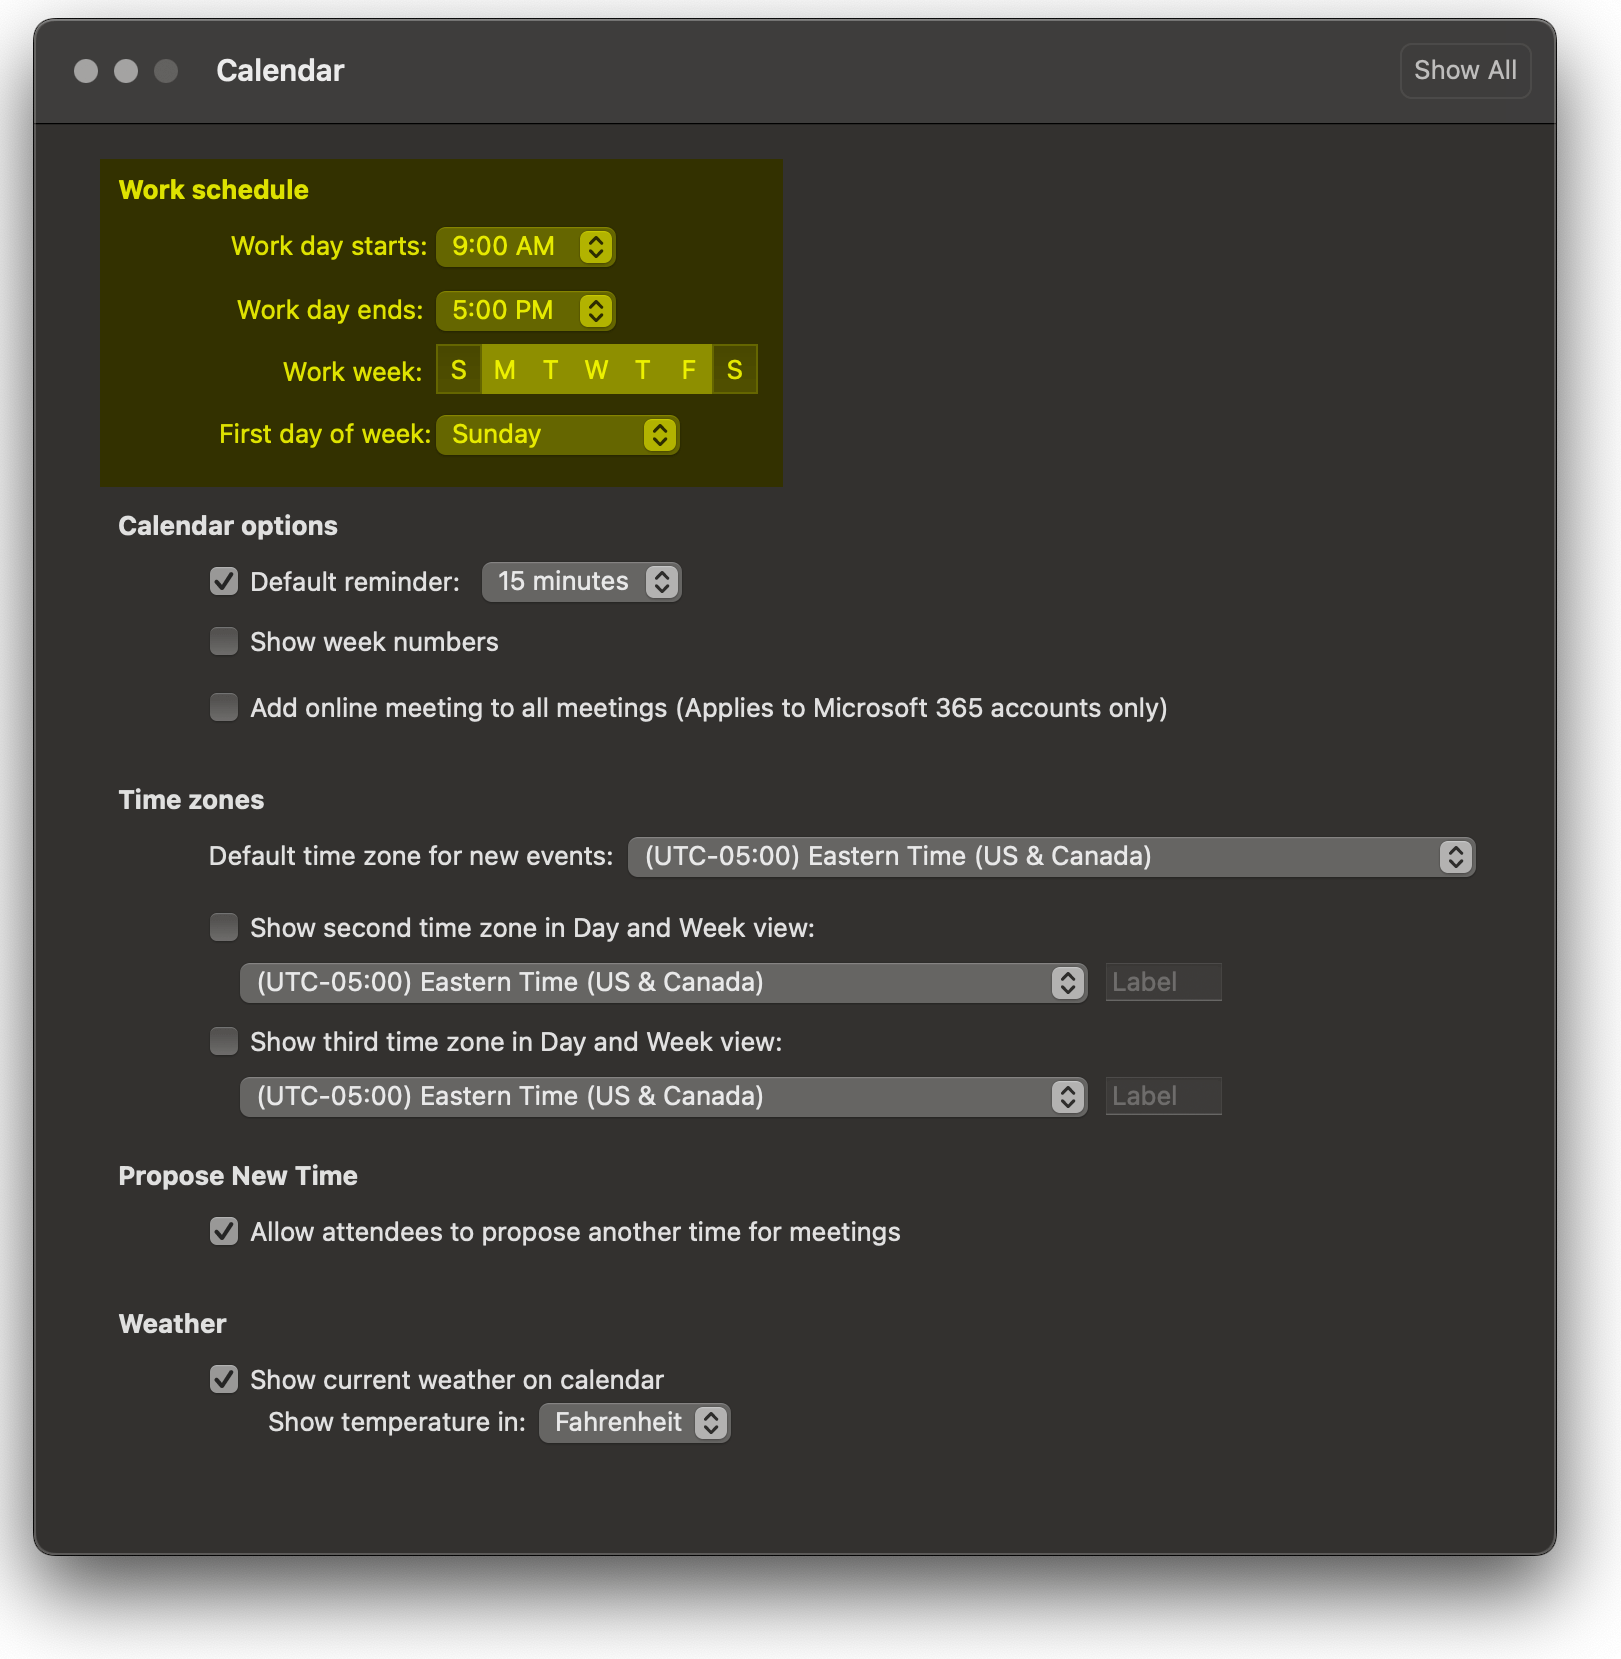
- Select Preferences > Calendar
- Then define your work schedule by choosing work day starts, work day ends, and work week.
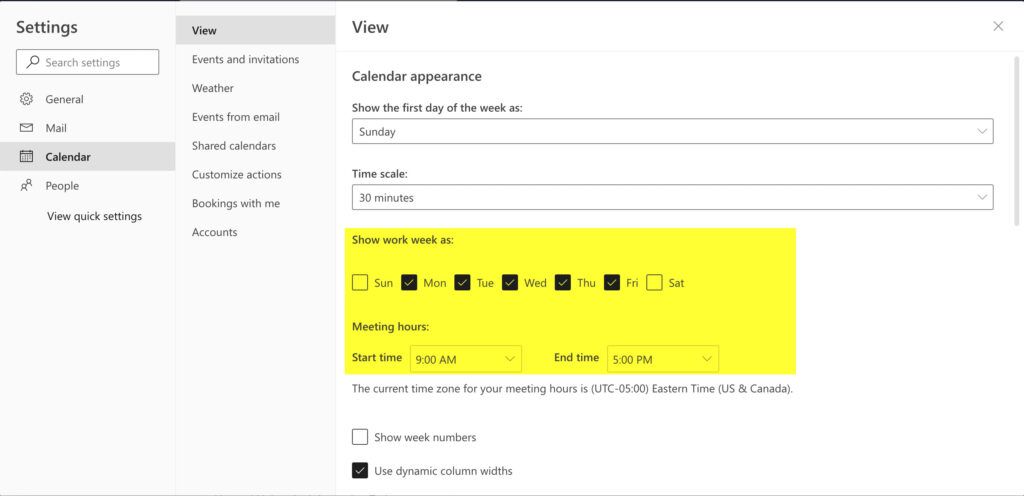
Outlook for web-based clients
To set your work schedule in Outlook, do the following:
- Select Settings > View all Outlook settings > Calendar
- Then define your work schedule by choosing work week days, and start time, end time.
How do I access a shared/resource account via the web access?
- Login to your personal account by opening a web browser and navigating to https://outlook.office.com/harvard.edu.
- Click on the user icon at the top right of the screen and choose “Open another mailbox” from the menu that appears.
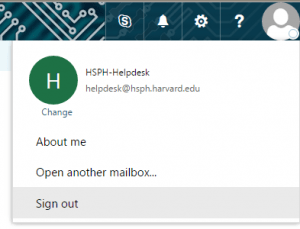
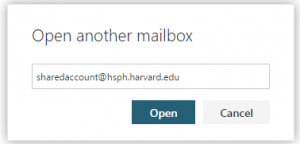
- In the box the pops up, enter the email address of the shared account and select it from the search menu that appears, them click on “Open”.
 NOTE: If you don’t have an office 365 account: You can still access the mailbox by opening a browser and navigating to the account url. The url will be “https://outlook.office.com/owa/mailboxemailaddress/?offline=disabled#”. So if the shared account’s email address was “helpdesk@hsph.harvard.edu” the complete url to access it would be https://outlook.office.com/owa/helpdesk@hsph.harvard.edu/?offline=disabled#.
How do I open a shared/resource account from Outlook for Windows?
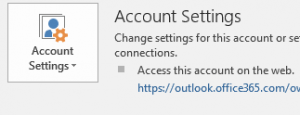
- Open Outlook and click on the File menu at the top right.

- Click on “Account Settings” and then choose “Account Settings” again from the drop down menu.
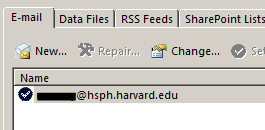
- Click on your email address in the list to select it and then click on the “Change…” button just above.
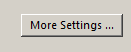
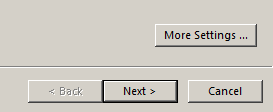
- Click on the “More Settings …” button.
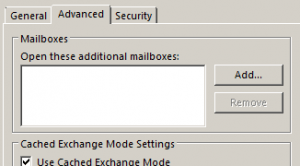
- Click on the “Advanced” tab in the window that appears, and then click on the “Add…” button.
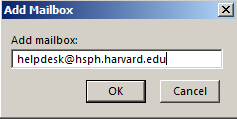
- Enter the shared account email address into the “Add mailbox:” window that appears and click on the “OK” button.
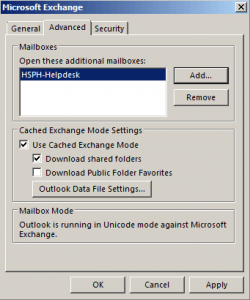
- You should see the account listed under Mailboxes now. Click “OK” to close the Microsoft Exchange Window.
- Click the “Next” button to move forward in adding the account in the Change Account Window.
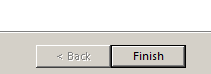
- Click the “Finish” button in the Change Account window to save the changes.
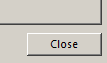
- Click the “Close” button in the Account Settings window to close out of your account settings.
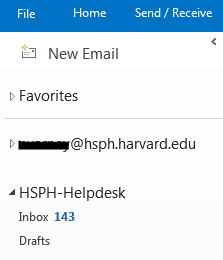
- Your shared account should begin downloaded messages and can be access from the main Outlook menu just below your primary email account.
How to delay or schedule sending email in Outlook?
Outlook for Windows
- Compose your message.
- Click the Options tab.
- In the More Options group, click Delay Delivery.
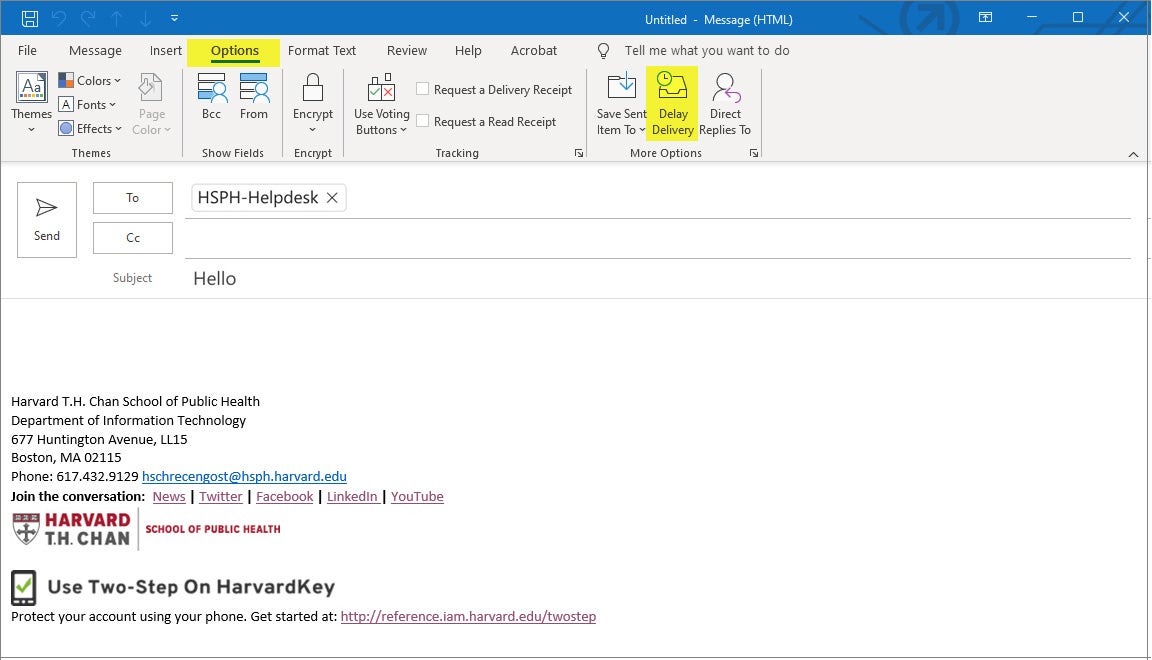
- Under Delivery options, check the box for Do not deliver before, and select a date and time.
- After you click Send, the message remains in the Outbox folder until the delivery time.
After you click Send, the message remains in the Outbox folder until the delivery time.
Outlook for Mac & all web-based clients
- Compose your message.
- On the Send button, click the dropdown arrow and select schedule send.
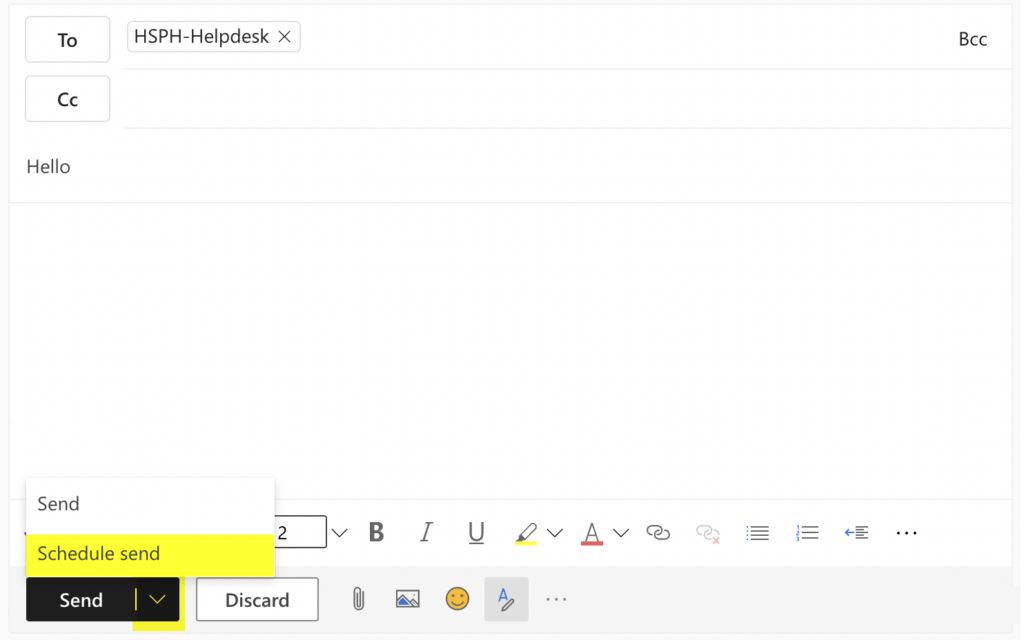
- Select the date and time you’d like the email to be delivered and click Send.
The message will be saved in the Drafts folder until the specified delivery time.


You must be logged in to post a comment.